Labeling Tool
Full reference for the Ground Truth Labeling Tool — every panel, button, and interaction explained.
Overview
The Ground Truth Labeling Tool is the visual annotation environment where you create the ground truth labels that your AI models are evaluated against. It consists of three areas: a header toolbar, a document viewer (center), and a right panel with three tabs (Labels, Tags, JSON).
Access the tool from the Labeling Hub by clicking any document row, or from a document’s detail view in the Document Workspace.
Header Toolbar
The toolbar runs across the top of the tool and contains all primary actions.
Document Navigation
When working in a dataset context, the header shows navigation controls:
- Previous / Next buttons (
</>) — move between documents in the same dataset - Progress counter — displays your position, e.g., “3 / 10”
- Choose Document — opens a picker modal showing all documents grouped by dataset
AI-Suggest Labels
The AI-suggest labels button triggers the auto labeler. It appears when a document is loaded and no fields exist yet.
- Click to start
- During the run no edits are possible. This takes roughly 10-15 seconds.
- On success, suggested fields populate the canvas and right panel
- If the AI output was truncated, an amber warning shows: “AI output was truncated — some labels may be missing bounding boxes.”
The auto labeler is a suggestion tool — the human operator is the final judge of the ground truth.
Undo
The Undo button reverts the last field operation. Keyboard shortcut: Cmd/Ctrl+Z (only active when not editing a text field).
Save
All changes need to be saved actively by clicking the Save button. Unsaved changes will be discarted upon closing the window - although warning popups are in place.
Export
The Export dropdown offers two options:
- Copy JSON — copies the full label payload to your clipboard. The button text changes to “Copied” for 1.5 seconds as confirmation.
- Download JSON — saves a
.jsonfile named after your document.
The Export button is disabled when no fields exist.
Document Viewer (Center Panel)
The center panel renders your document (PDF or image) with interactive bounding box overlays.
Viewer Toolbar
A small toolbar above the document provides:
Visibility toggles (checkboxes):
- Show all keys — displays the key name above every bounding box
- Show all values — displays the value above every bounding box
- Show group colors — colors bounding boxes by their group assignment
Page navigation (multi-page PDFs only):
- Previous / Next page buttons with a “X / Y” counter
Zoom controls:
- Zoom out (
-) — minimum 0.5x - Fit width — resets zoom to 1.0x
- Zoom in (
+) — maximum 2.5x
Drawing Bounding Boxes
Click and drag anywhere on the document to draw a new bounding box. A dashed rectangle previews the area as you drag. On release, a new field is created and its editor card appears.
If your drawn box encloses two or more existing boxes, a group is automatically created containing those fields.
Bounding Box States
| State | Visual |
|---|---|
| Normal | Subtle fill, thin border |
| Hover | Floating preview card showing key and value (read-only) |
| Selected | Bright fill, thicker border, white ring glow, editor card appears |
| Critical | Red border instead of group color |
Each box has a small resize handle in the bottom-right corner (drag to resize). Boxes cannot be moved or resized outside the document boundaries.
Editor Card
When a bounding box is selected, an editor card appears above it with:
- Key input — the field name (displayed in snake_case). Colored background matching the group color.
- Value input — the extracted content. Placeholder: “no value”.
- Delete button (trash icon) — removes the field.
- Move button (move icon) — click and drag to reposition the box.
Press Tab to move from the key input to the value input, then to the next field’s key input. Shift+Tab moves backwards.
Right Panel
The right panel has three tabs, toggled via icons on the right edge.
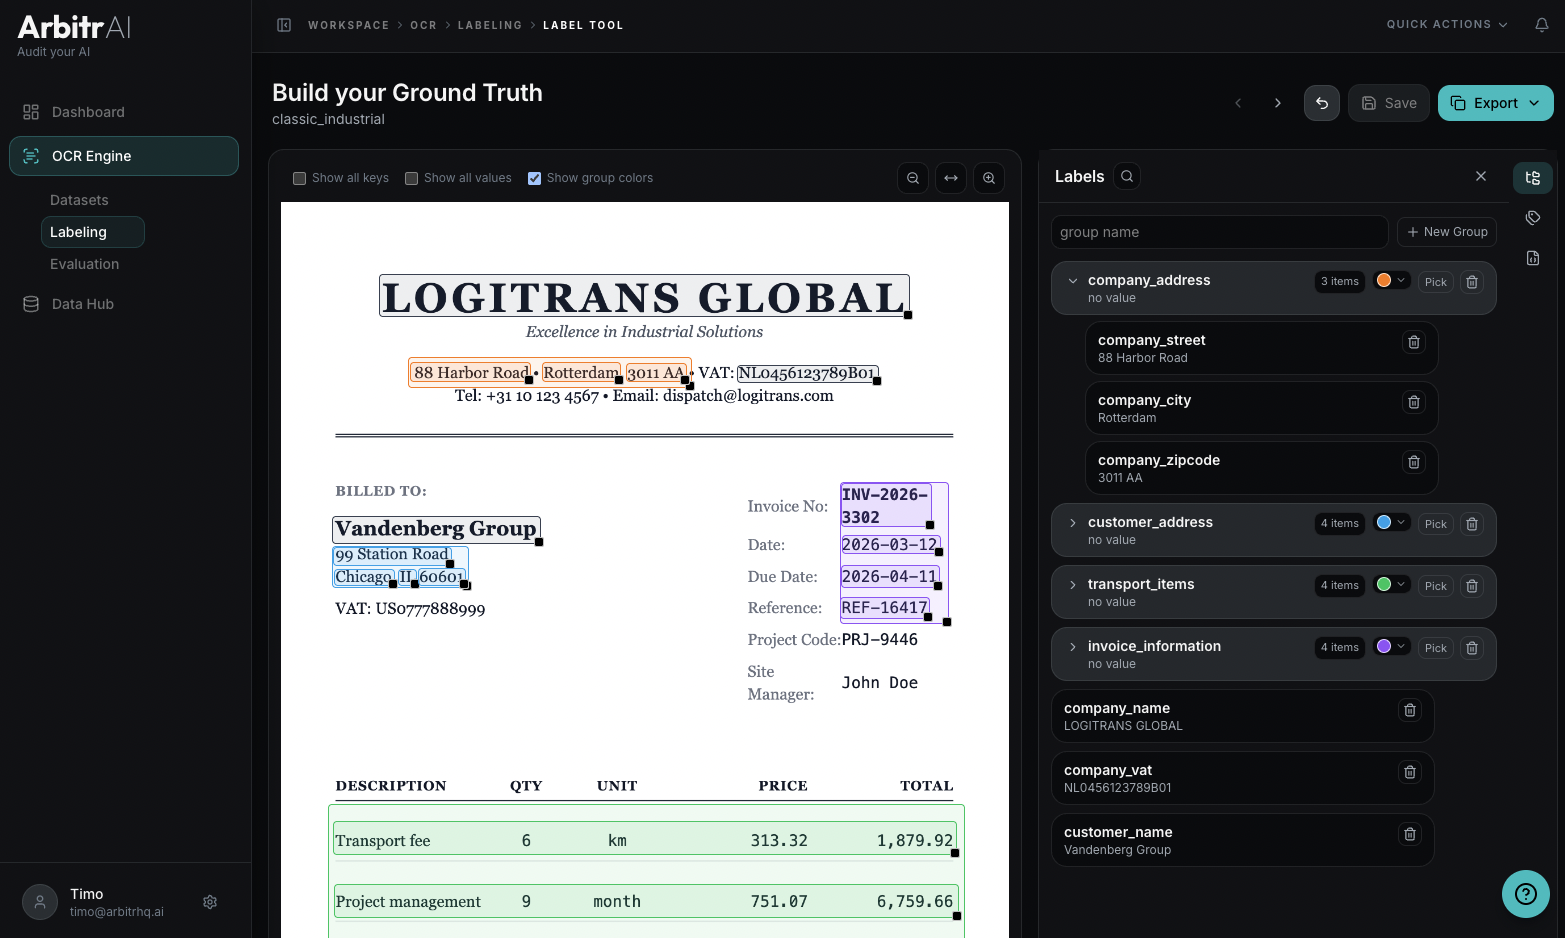
Labels Tab (Grouping)
This tab shows a hierarchical tree of all fields and groups.
Creating groups:
- Type a name in the “group name” input and click New Group (or press Enter)
- Or draw a bounding box around existing boxes on the document — a group is created automatically
Group properties:
- Name — displayed in bold snake_case
- Color — click the color circle to open a palette of 12 predefined colors
- Child count — badge showing the number of items in the group
- Collapsible — click the chevron to expand/collapse children
Group actions:
- Pick — enters assignment mode. A banner appears: “Assigning boxes to group: {name}. Click boxes on document.” Click boxes to add them to the group, then click Done.
- Delete — removes the group (children become root-level fields)
Drag and drop:
- Drag any field onto a group to make it a child
- Drag a field to empty space to move it to the root level
Search:
- Click the search icon to filter groups and fields by name. Matches are highlighted in accent color.
Removing multiple boxes at once
- If you want to remove multiple boxes at once, just draw a large box around them, and click that box’ delete button. It will delete all inside boxes.
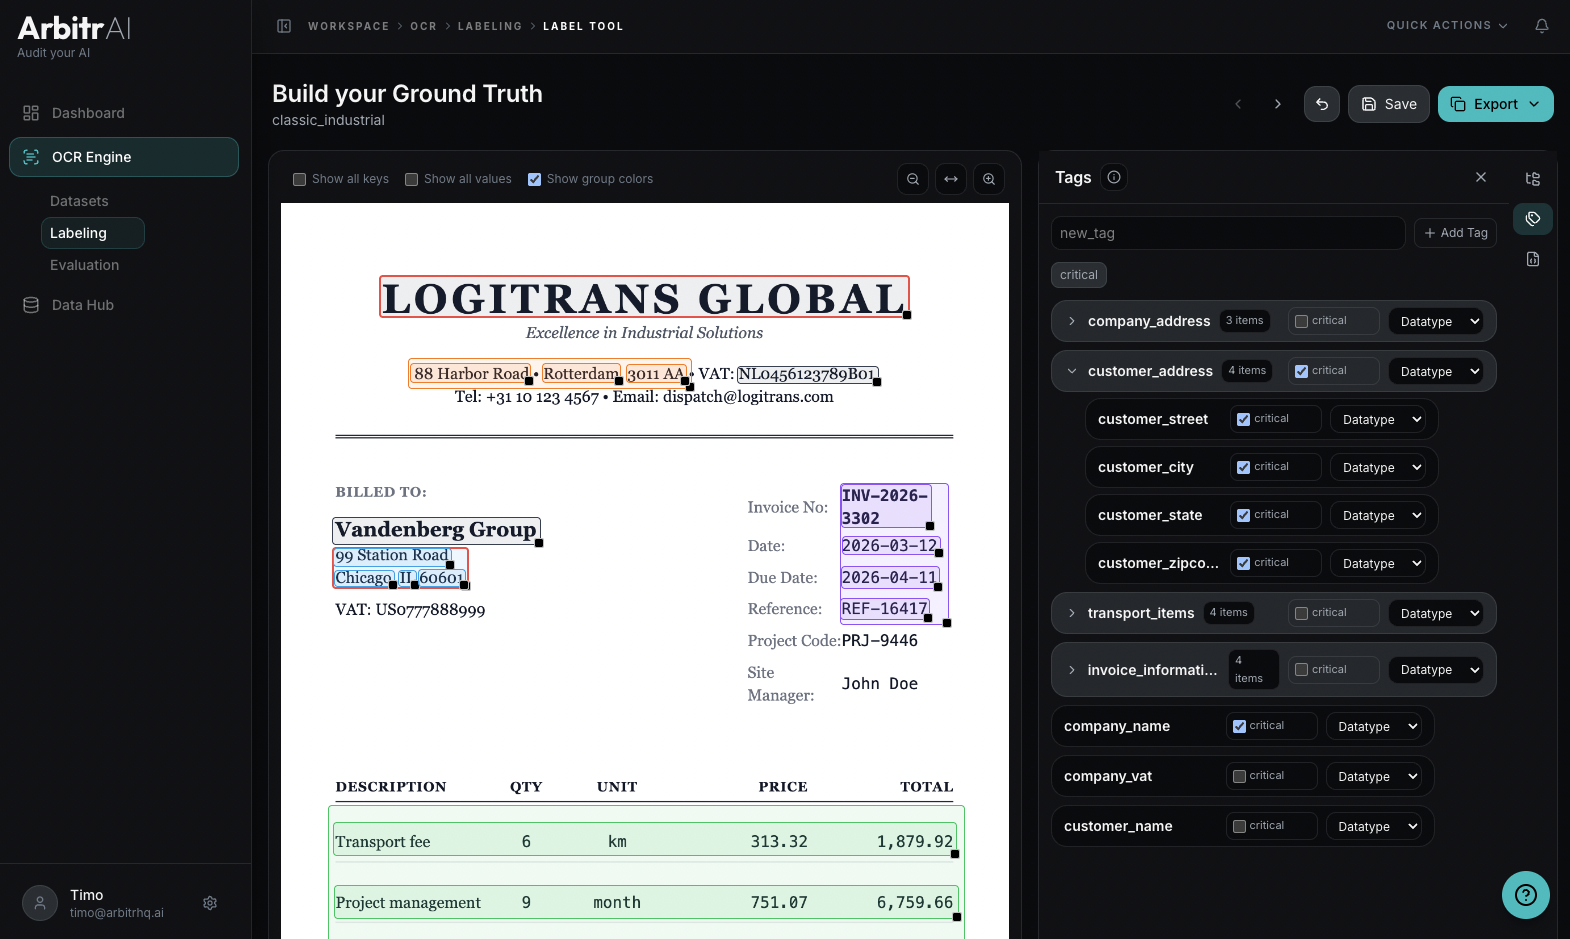
Tags Tab
This tab lets you assign metadata tags to individual fields.
Built-in tags:
- Critical (checkbox) — marks the field as critical for evaluation success criteria. Always visible, cannot be removed.
- Datatype (dropdown) — choose
string,int, orfloat. Default: unset.
Custom tags:
- Type a name in the “new_tag” input and click Add Tag to create a boolean tag
- Custom tags appear as checkboxes on each field
- Up to 4 tags display inline; additional tags are accessible via a ”…” overflow menu
- Custom tags can be removed (click the X on the tag badge); the “critical” tag cannot
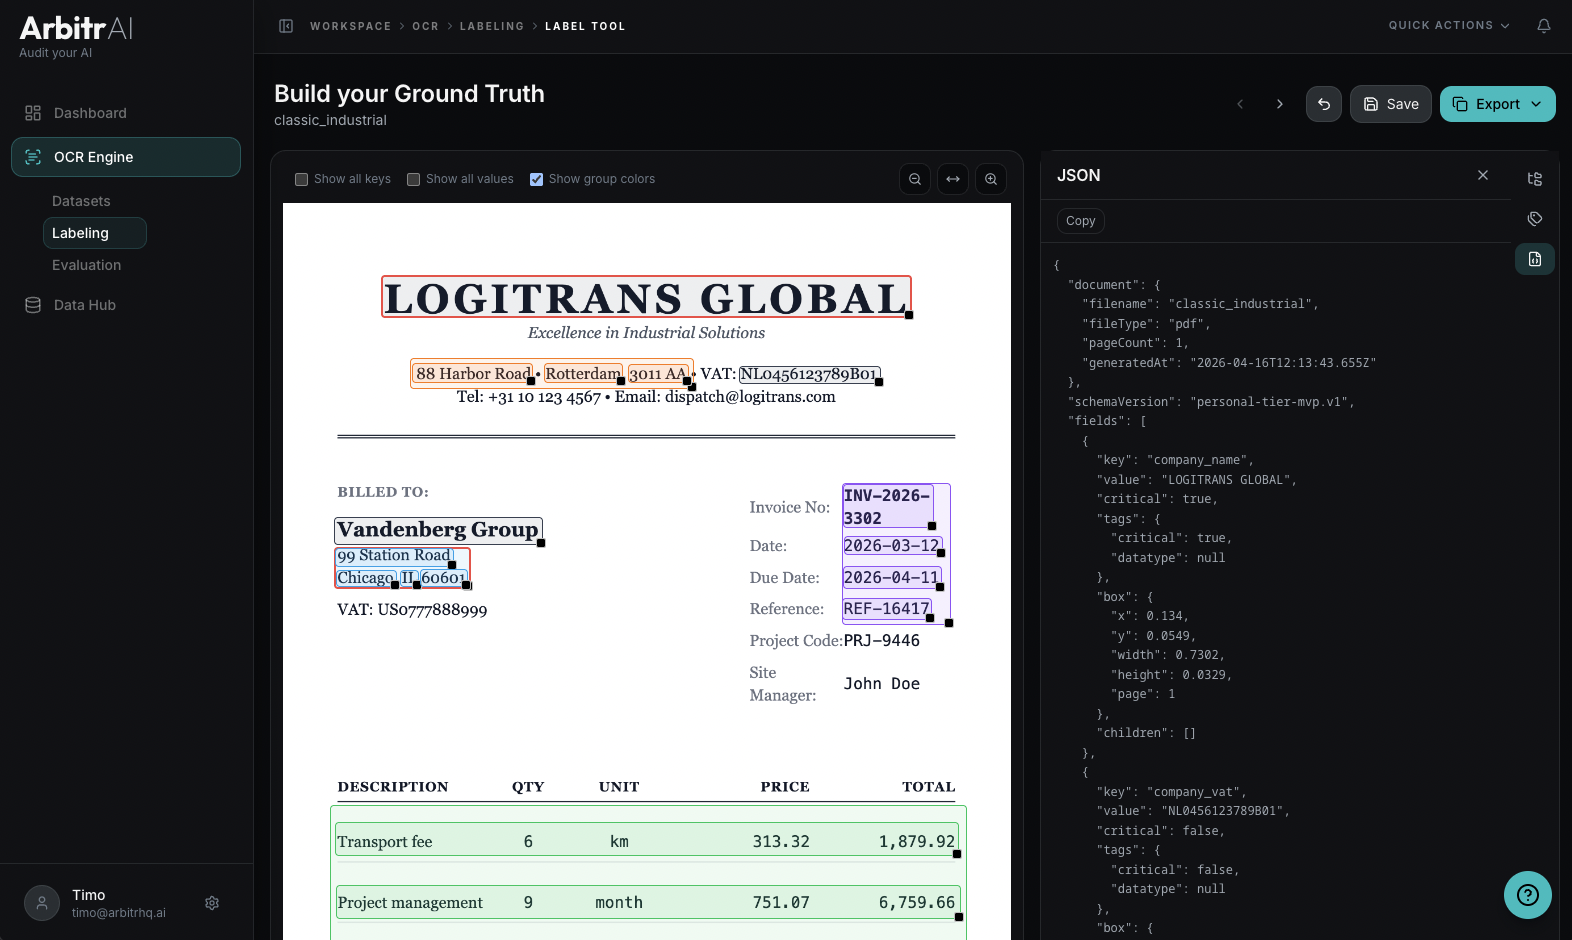
JSON Tab
This tab shows a live preview of the full export payload in raw JSON. The structure includes:
- document — filename, file type, page count, generation timestamp
- schemaVersion — export format version
- fields — array of all labeled fields, each with:
key,value,critical,tags,box(normalized coordinates and page number), andchildren(nested fields)
A Copy button above the JSON lets you copy the payload to your clipboard.
Keyboard Shortcuts
| Shortcut | Action |
|---|---|
| Cmd/Ctrl+Z | Undo last action |
| Tab | Next field input (key → value → next key) |
| Shift+Tab | Previous field input |
| Enter | Confirm and deselect current field |