Labeling Tool
Create ground truth labels using the visual annotation tool — draw bounding boxes, assign keys and values, and use the auto labeler.
Overview
Accurate evaluation requires accurate ground truth. The Ground Truth Labeling Tool lets you create structured annotations that serve as the benchmark for your AI model’s output.
You can access the labeling tool from the Labeling Hub (under the Labeling tab in the OCR section) by clicking on any document, or directly from a document’s detail view.
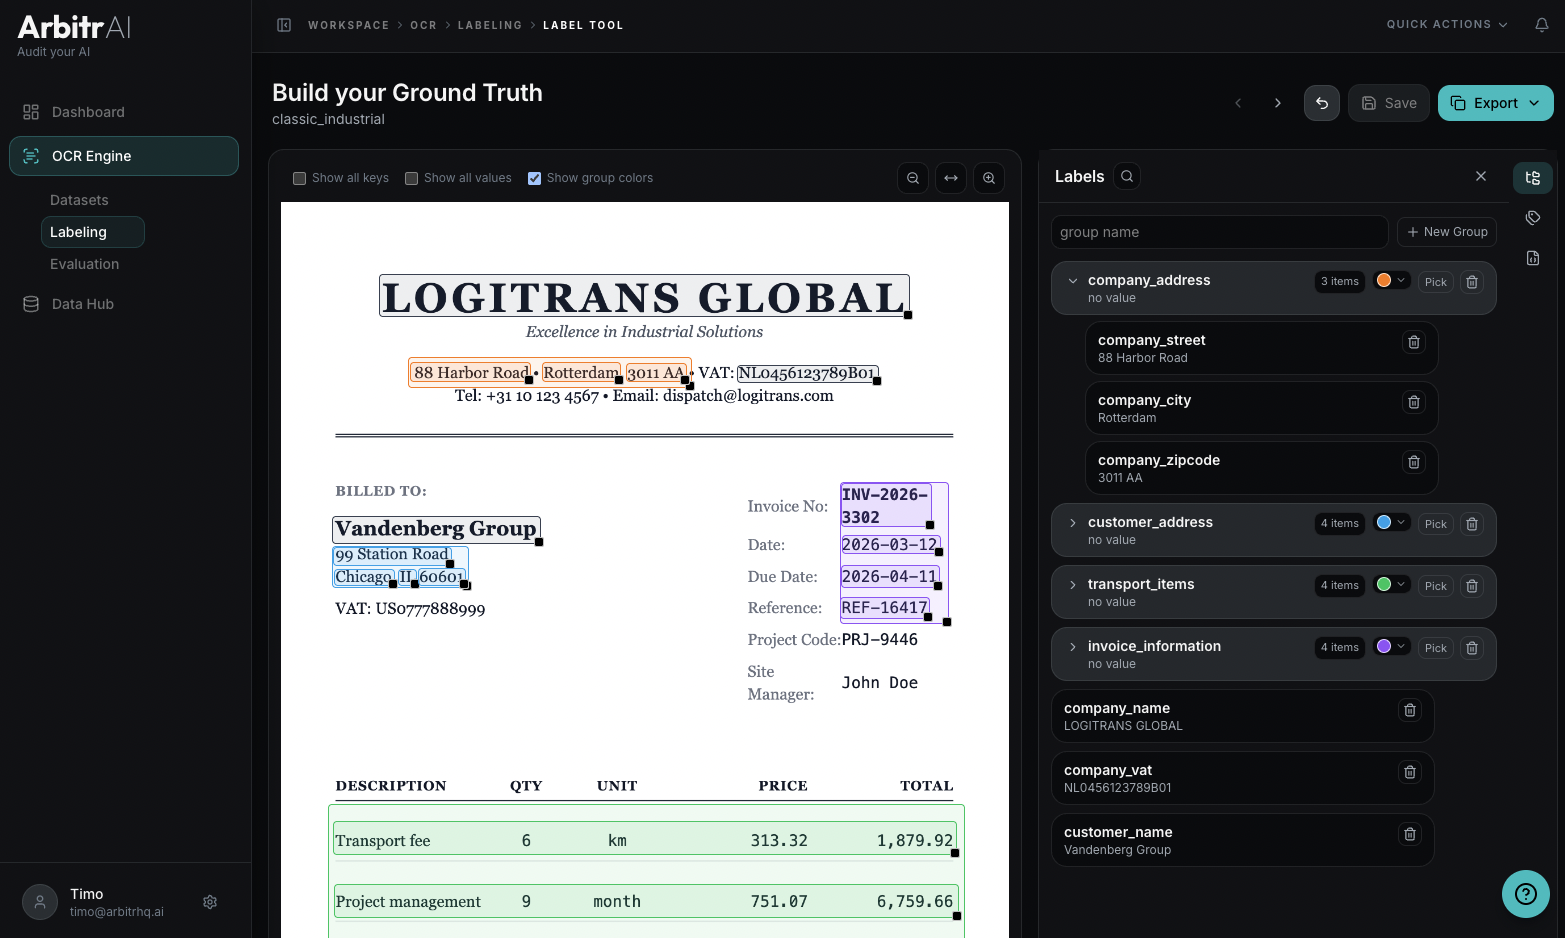
Draw Bounding Boxes
With a document open in the labeling tool, click and drag on the document preview to draw a bounding box around a region of interest — for example, an invoice number, a date field, or a total amount.
- Click and drag to create a new box
- Click an existing box and press the arrow buttons move it
- Drag the black of a box to resize it
Use the zoom controls to get precise placement, and the page navigator to move between pages in multi-page PDFs. The multiple documents in a dataset can be navigated without leaving the tool by using the ”>” and ”<” buttons on top.
Assign Keys and Values
After drawing a bounding box, assign a key (the field name, e.g., “invoice_number”, “date”, “total_amount”) and a value (the actual content in that region). After entering the key, tab to jump to the value field.
These key-value pairs form the ground truth that your AI model’s output will be compared against during evaluation.
Organize Fields into Groups
The Grouping panel on the right side shows related fields are organized into logical groups. For example, group all address fields together, or all line-item fields.
Making groups can be done visually on the document: simple draw a box around other boxes to group them. It is also possible to simply draw new boxes inside a group box to add elements. Group boxes do not require a value.
- Groups are collapsible and have auto-assigned colors
- Drag fields between groups to reorganize
- Use the search/filter to find specific groups or fields
- Customize colors per group for visual clarity
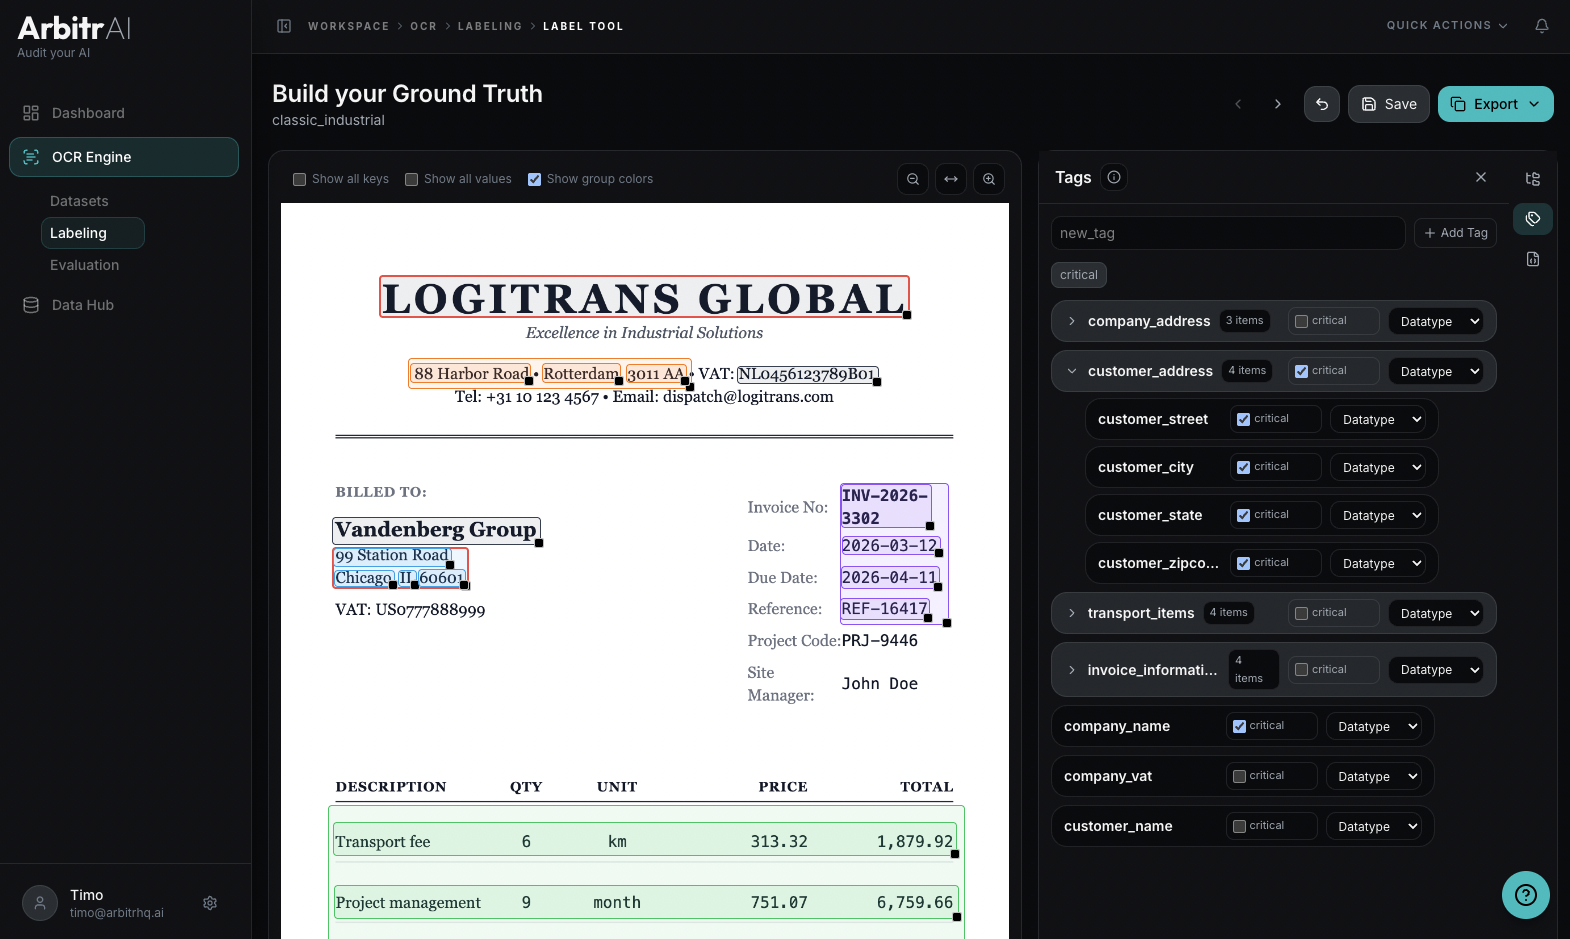
Mark Critical Fields: A key component in evaluation!
Some fields matter more than others. Mark fields as Critical to indicate that they must be extracted correctly for a run to be considered successful. This feeds into the success metrics during evaluation — you can configure how many critical fields can be wrong before a run is marked as failed.
Use the Auto Labeler
For repetitive labeling tasks, the auto labeler can suggest annotations based on patterns it detects across your documents. Review and adjust its suggestions, then save.
Note that the autoloader is a suggestion tool: it does not guarantee true labels! The human operator is the final judge of the ground-truth.
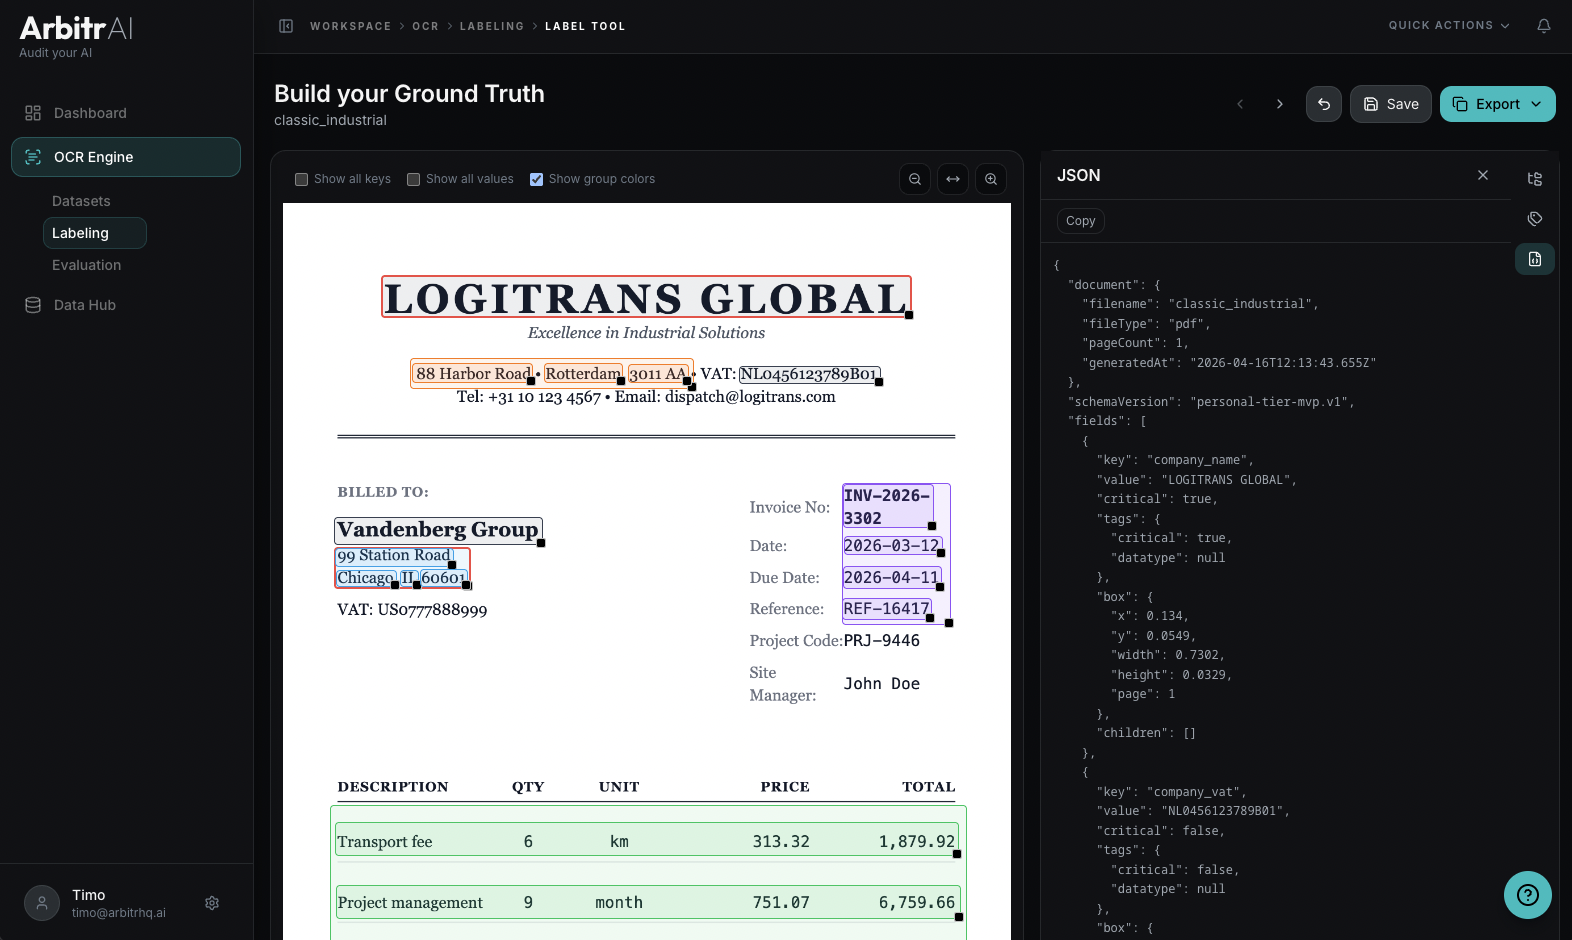
Save and Export
- Save your labels as ground truth for the document — this links them for use in evaluation runs
- Export as JSON to view or share the structured label data
- Annotate to save as a new version while preserving history
The labeling tool supports undo for field operations, so you can experiment without worrying about mistakes.
Navigate Between Documents
Use the document navigator at the top of the labeling tool to move between documents in the same dataset. A progress indicator shows which document you’re on (e.g., “Document 3/12”).
Tips
- Be consistent with key naming — it directly affects evaluation quality
- Label a few documents manually first before using the auto labeler
- Use groups to mirror the logical structure of your documents (e.g., header fields, line items, totals)
- Mark fields as critical when they represent high-value data points for your use case